Nov
1
2007
My solo show opened in Santa Cruz a few hours ago.
To see studio photos of ALL the pieces look here :
http://forums.kidrobot.com/viewtopic.php?p=1092578#1092578
There are too many to repost here..
Opening night event pics up soon.
2 comments | tags: Custom Toys, Events, Mechtorians | posted in Events
Oct
29
2007
Here is the Letterpressed print set for the upcoming Spit & Polish show.

Signed and numbered edition of 50 (plus 6 Artists proofs).
Pressure printed in mottled Sepia and Purple on thick, off white hammered rag stock.

Paper size 8″ x 10″. Image size 4.5″ x 5.5″
Available from Cardboard Spaceship as of the show opening on Halloween.
There will be some up on Spookypop soon after.
available as a set or individually.
1 comment | posted in Uncategorized
Oct
17
2007
Released for Halloween.
Cloth Head.
Halloween colours, edition of 1000 available all good underground/indy toy stores.
Mono, edition of 500 available exclusively from Rivet Gallery.


4″ tall with removable head sack, mask, bag, whatever you wqnt to call it.
I may have a few to sell from my website at some point.
2 comments | posted in Uncategorized
Aug
20
2007
There is a new interview with me up here : http://sandman.vox.com/library/post/interview-with-doktor-a-1.html
Check it out..
1 comment | posted in Uncategorized
Aug
16
2007
So it was decided that the attic space was so large it could comfortably be split in half to form not only a spacious studio but a fair sized guest / spare / box room… So I did some reading on how to build a wall..
First I need a new door. So out looking for doors we went and soon found a local place that strips old pine doors. A suitably small door was purchased for the attic room and as we were there another three were purchased to replace nasty modern doors eleswhere in the house. Also the fellow came and took our remaining doors away and bought them back a few days later sans-ancient multilayered paint. I still have to sand them down and oil and wax them but thats a lot of tough stripping work I dont have to do any more……. which is nice.
So lots of new, old doors..
A bit of maths later and lots of timber was ordered..
Then lots of measuring sawing and swaring.. And a couple of days later I had up all the studwork (vertical pieces) for the new wall as well as the top and foot plates. I then built the door frame around the new mini door and fixed it in place with the first noggin (horizontal piece). Yes they really are called Noggins.. That made me happy.
Many more Noggins later and then a few more to fix electrical sockets and light fittings to and I had this.
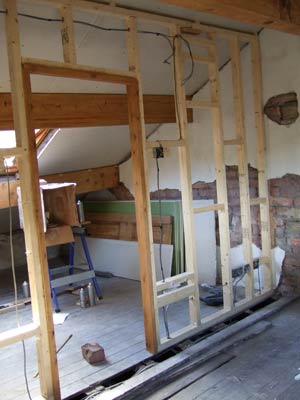
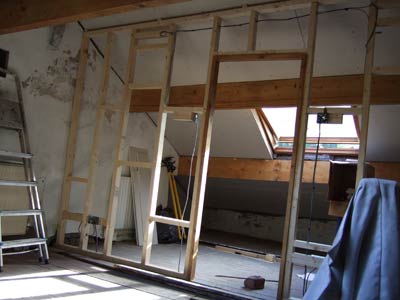
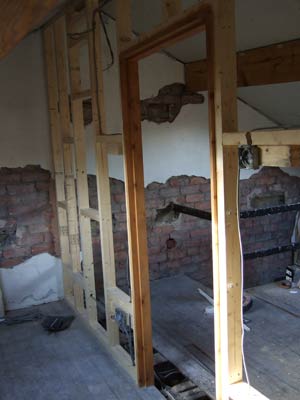
A week or so later and the Electrician arrived to do the first fix (putting in the basic wiring and socket boxes). So now its ready for me to start more plasterboarding..
I stained the pine used for the door frame so it matches the old pine in the door better. I must source reclaimed pine for more of the jobs that need doing really..
By the way. A few people have mentioned that the wall looks better as brick.. well look at this :
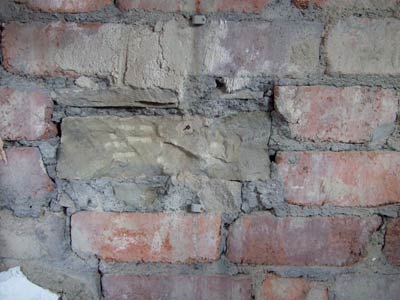
That’s what they look like up close.. Not too pretty. And the morter is all crumbly so it would ALL need replacing to have the wall exposed.. Not going to happen..
Moving forward faster now is the plan.. Plasterer booked for six weeks time.. Lots to do to be ready for him..
Comments Off on Studio conversion blog part 4.. Studs and Nogginsis.. | tags: Studio | posted in Studio
Aug
15
2007
Just a note to anyone out there awaiting commission works from me.
Sorry for the long wait.
I have recently been offered a couple of solo shows, which, as I am sure you can imagine I accepted right away.
This does however add a mountain of work on top of my existing very large hill of commission pieces and the collosal pile of ever moving sands which is my studio/house renevation.
Please bare with me. I will get to you eventually.
Thank you.
Comments Off on Sorry for the delay.. | posted in Uncategorized
Aug
12
2007
Ok bad pun….
So after the insulation went up it was time to board out and make it like a room again.
It took me, with help from my splendid father two solid days to get all the plaster boards in place.
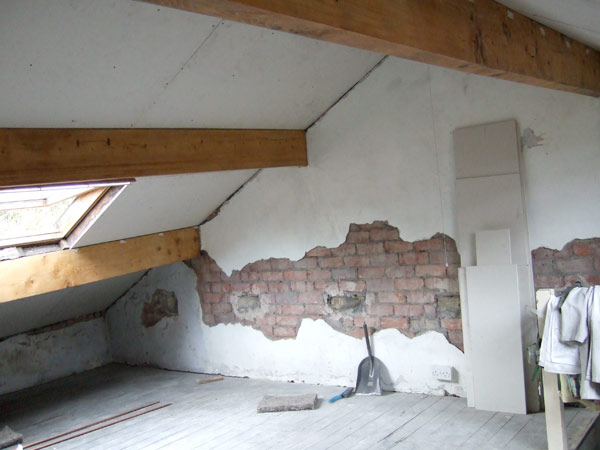
New Ceiling
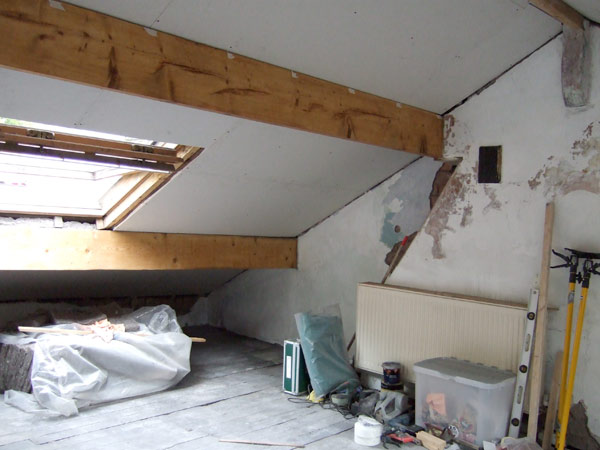
As suspected there is not a single vertical wall or square angle in the place. Some angles act obtuse when they appear acute! Hmmm like some ancient evil has been lurking here… So lots of trial and error and hundreds of screws. We got quite good at it by the end. It has changed the light quality in the space no end. And the attic is feeling like a room again not a rubble dump.
More loose plaster needs to come off the old wall too. There is still a long way to go. But its moving ahead nicely now.
3 comments | tags: Studio | posted in Studio
Aug
5
2007
The Hijaked Scumbo custom show was held last night in Devil Doll Gallery in Long Beach California.
All the show pieces are up for grabs on their website here : http://devildollrecords.com/E_Store/index.php?cPath=58
Lots of great artists and one by Doktor A.
Here is a pic of mine…

Comments Off on Scumbo show | tags: Custom Toys, Events | posted in Custom Toys, Events
Aug
1
2007

Congrats. And thanks to everyone who entered. Thanks also to “Toys R Evil” for running the comp.
Comments Off on Competition winner | posted in Uncategorized
Jul
19
2007
So people have actually been emailing me about updates on the studio conversion I am doing.
Truth be owned I have not had much chance to work on it of late.
So I took the decision to take the whole of July off work to hit it hard and push it on a lot.
I have a few solo shows coming up and i really need the extra dedicated room to have several pieces on the go at one time, so I need to get this studio sorted out.
So after I got all the old ceiling down I was left with 76 sacks of rubble and wood to get rid of. Several days of carrying all that down two flights of stairs and out into a skip and it was cleared.
Then came about three weeks of finishing stripping the beams. There are some people who should be shot for their crimes against interior decorating. I took upto nine coates of paint off of those beatuiful wooden beams. In one place some idiot had actually put woodchip wallpaper painted light blue OVER the wooden beam…. !?!…
Anyway with a combination of stripping chemicals (Eco friendly water based ones I should point out), many dedicated hours with a handheld steel scraping blade and a few power tool I finally got pretty much all the paint off. I sanded and oiled the wood to stop any more dirt getting into the beams. I will re-oil and wax them again later on when the proper final decorating is done.
Next up was putting in all the insulation so I dont freeze during the winter.
We chose Thermafleece insulation as it is super eco friendly. Its basically massive slabs of felted wood direct from the hill farms. The off-cuts of sheeps wool that are not suitable for clothing are used to make this. So its like giving your roof a wooly jumper. Its great to work with. Cuts with scissors and no mask or gloves needed unlike the nastly fiber-glass stuff.
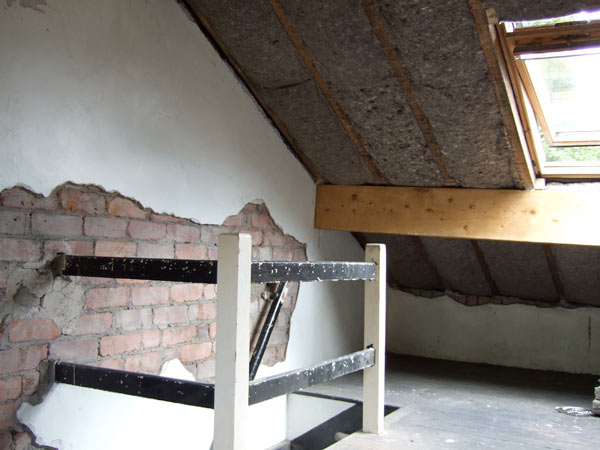
I cut the pieces to size and stapled them up to stop them falling out before I could get the boards up.
Leaving an air gap for ventilation. Though the nature of the wool should cut down the condensation problem this room has had in the past.
I managed to get all the insulation up in just over a day.. Nice.
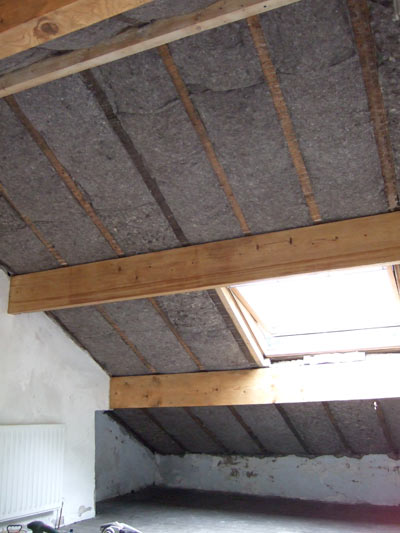
I have been amasing scrummy furniture and stuff for the final studio whilst doing this work. I cant wait to get it all together. But a long way to go yet…
9 comments | tags: Studio | posted in Studio