Apr
16
2008

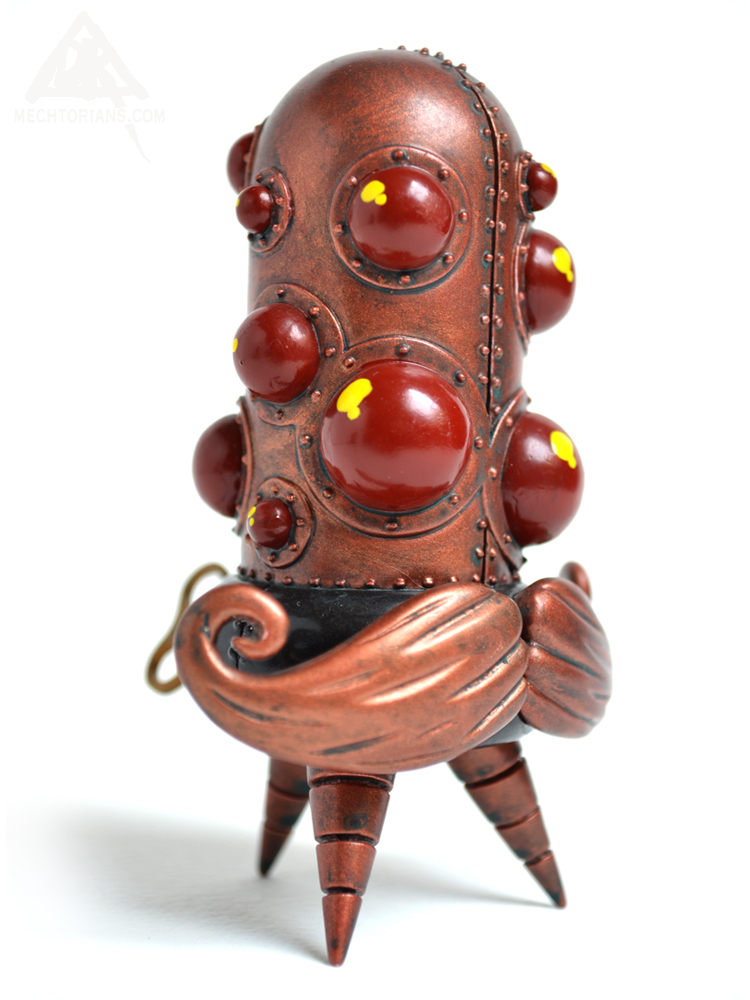
With one of the most anticipated art toy releases of the year, the good Doktor A and MINDstyle are releasing ten (10) resin paint masters of the Mr. Head figure from the upcoming Mechtorians Series I. These hand painted and highly detailed resin masters will certainly be a must have for any collector and fan of Doktor A. Known as one of the industry’s best toy customizers, Doktor A has made a name for himself with his unique style and amazing attention to detail.
Not to be confused with his vinyl toy figures in production, these resin figures are rare paint masters that have seldom been made available to the public. The resin paint masters are done on a one to one scale (with 7% for shrinkage) based on his mini figure series. The NYCC exclusive Mr. Head paint masters will retail for $199.99 and go on sale 4PM at the MINDstyle booth #1313 on Friday, April 18th. Limit one per customer.

A second NYCC Copper version paint master from the highly anticipated Mechtorians mini figure series will be available to Art Toys Society members only. ATS members will be able to reserve their copy of Stephen LePod through the 1045 Showroom for shipment or pick up their reserved copy at MINDstyle booth #1313. A confirmation will be sent to the members with detailed instructions. As the edition is limited to 10, orders will be randomly selected from ATS members wishing to make a purchase even if not attending NYCC.
In addition, Platinum ATS members will be able to purchase one of five ultra rare original version resin paint masters. The original blue paint master is based on Doktor A’s Explorer figure from his upcoming MINDstyle series. The NYCC exclusive Stephen LePod resin paint masters will retail for $199.99. If you’re wondering, solicitations will be made directly by email to ATS members. Clearly, an ATS membership has its privileges.
3 comments | tags: Events, Mechtorians | posted in Events, Toys
Apr
8
2008
So is the studio finished I hear you ask.
No. It’s not.
Well the room was finished but that was just a blank canvas. I have to fill the canvas and make it a useable place before I can move in. This mean furniture. Yes I know I could just go to Ikea and kit it out with all I need to get things rolling. But if I did that with the intention of sorting it out nicely some time when I have enough time, then I know it would never happen. You get blind to dodgy furniture and space use shortcomings and muddle on. I figured that as all that time was spent doing the structure of the room right I should continue in that mindset and do the furniture right too. Oh sure I have the odd bit of nice furniture I have picked up over the last few years but not enough and not stuff which would work well in the space.
So.
Start from scratch…
(Yeah your right I don’t do things the easy way… Where is the fun in doing things the easy way.. No challenge.)
I had the good fortune a couple of years ago to discover an old (Early 20th century) sloped desk at the back of a furniture clearance center in Huddersfield. It looked (from the kipple that was still in it’s drawers) to have last been used at a Taylors or possibly in a cloth cutting department in a Mill back in the early Eighties. It is a huge old sloped work surface with three drawers beneath in style of a campaign cabinet. And a spin at only £20.. Once I had spend a couple of days scrubbing it, cleaning off the old laquer and re oiling and waxing it, it would have fetched several hundred pounds in an antique centre.
I have had it cluttering up several rooms stood up on its end ever since, knowing one day I would have a suitable room for it.. And this is that room.. Except it has no legs…
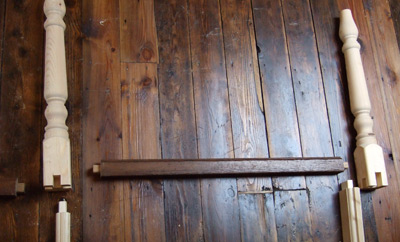
Luckily for me on a recent trip to the most splendid Beamish living Museum ( http://www.beamish.co.uk ) I had seen a desk very like this as it would have been in situ at the time of it’s construction. So I now knew what it would have looked like originally. After an exhaustive hunt for old table legs which would be suitable I gave up on finding anything reclaimed and turned to reproductions. I hunted down a place online which did wood turning and purchased three legs from them in a style very similar to the ones I had seen. I then decided that the remaining framework should be built using traditional woodworking joints in the Arts & Crafts tradition in which I am refurbishing the house.. So I had to master a few basic woodworking skills like cutting in a straight line and using a Chisel tolerably. I constructed a support frame with these budding skills using some new wood and some reclaimed pieces from an old dining table. I figured some new wood was ok as I was going to have to stain the new legs to match the colour of the desk anyway..

This to my surprise went pretty well any gave me a stable work space..
I then took a month or more painting pictures of Mechtorians on this workspace for an upcoming solo show at Rivet in June.
Last week I returned to the job of finishing the studio. So the support frame was stained and oiled and waxed and all worked splendidly..
I then turned my attention to storage.. I constructed a wide shelf for one end wall of the room from some of the floorboards I had removed from the room. I cut out the bad parts and sanded and oiled them and fixed them up to the wall using a couple of cast iron Victorian toilet systern brackets I got from Ebay (Once I stripped the old paint off, wire brushed the rust down and recoated with a suitable brass enamel paint they looked pretty good… I would have preferred to leave them the bare polished metal but the rust damage was too deep to make that work..)
I then set about constructing a shelving unit to run the length of the room which could have a large storage space under the eaves behind it for all that stuff that one usually keep in an attic..
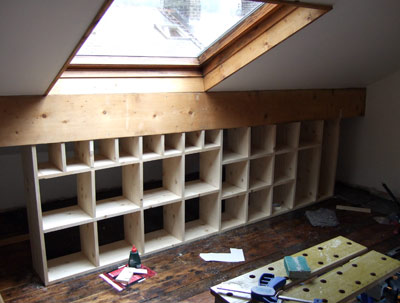
I drew up plans to make best use of the odd sloping space beneath one of the beams and started in..This unit is mostly intended to house books of varous sizes, other storage media and canvases and prints (slid back into the eves space through the tall opening at the far right..
It will ultimately be closed in with an end wall to the left and a door to access the storage crawlspace..
This is the main construction.

Since this pic was taken I have finished the shelves to the point of staining and have also designed and built another smaller unit of shelves and a large display cabinet to house a sizable chunk of my toy collection… More info and pics of that in the next blog..
I figure at this point I have about one more weeks work before I can start unpacking boxes…..
1 comment | tags: Studio | posted in Studio


