“In the works” A step by step guide to the making of a toy. Part 3
The next step on the process is for the toy company to make the tooling prototype sculpture. This is either created by a craftsman in wax or as in this case and more and more these days, created in a computer 3D model and then outputted to a “rapid prototyping” machine which creates the form in resin.
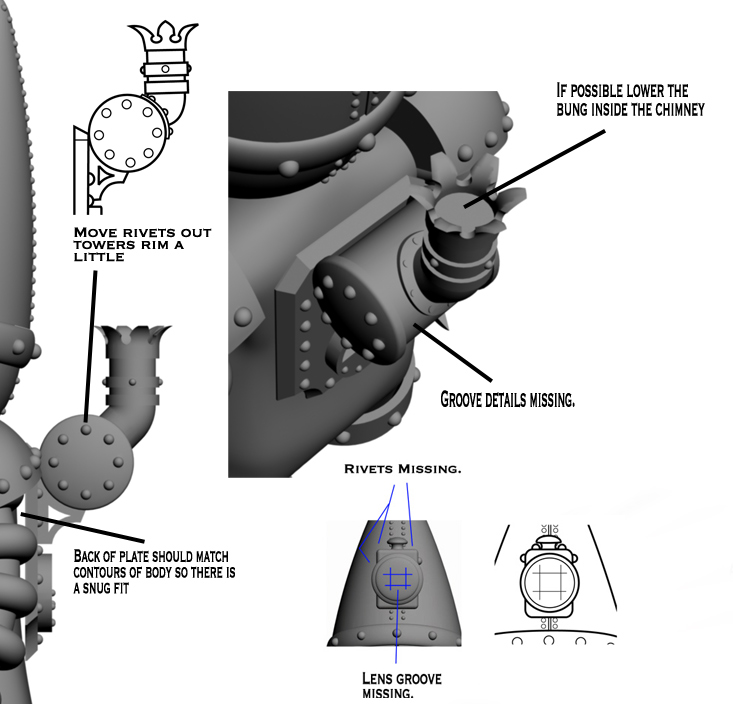
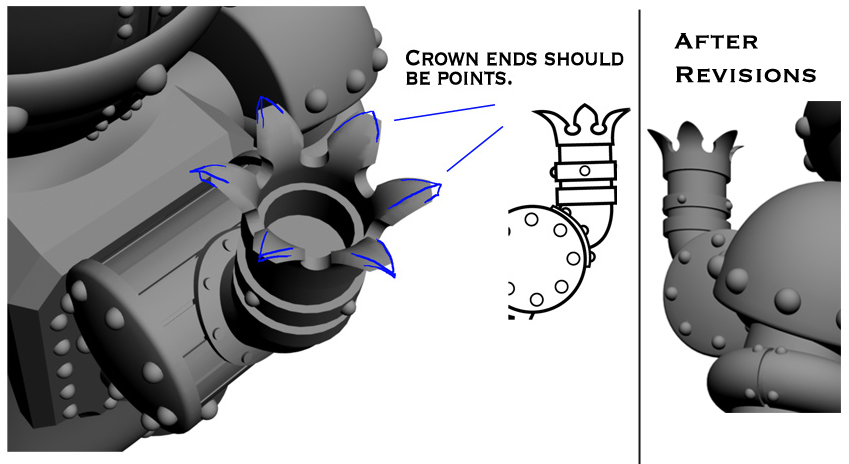
Either way at some point photos or renders come back to the artist to oversee the process and just check everything is tying in to the original idea and design. Also at this stage things can be altered a little or tweeked in a slightly different direction if the 3D version of the figure just doesnt look quite right. I mean by this that something drawn in 2D can look balanced and fine but when it’s translated into 3D it can look unbalanced and need adjusting to look good again. This is of course all subjective to the eye of the artist but as they are the art director on the project it’s up to them to speak up at this point or else let the toy go ahead with possible oddities.
For example the screw on the drill on the GNOME’s head was rendered as drawn but to me looked off. Suggestings for a different way of doing it were made, the model adjusted, a better shape arrived at.
Also alterations were made to the hat rim to allow the hat to lock snugly into place without the need for any other fixing mechanisms.
Here are a couple more examples of how details can be altered at this stage to get everything looking bang on.


